Record Type Designer
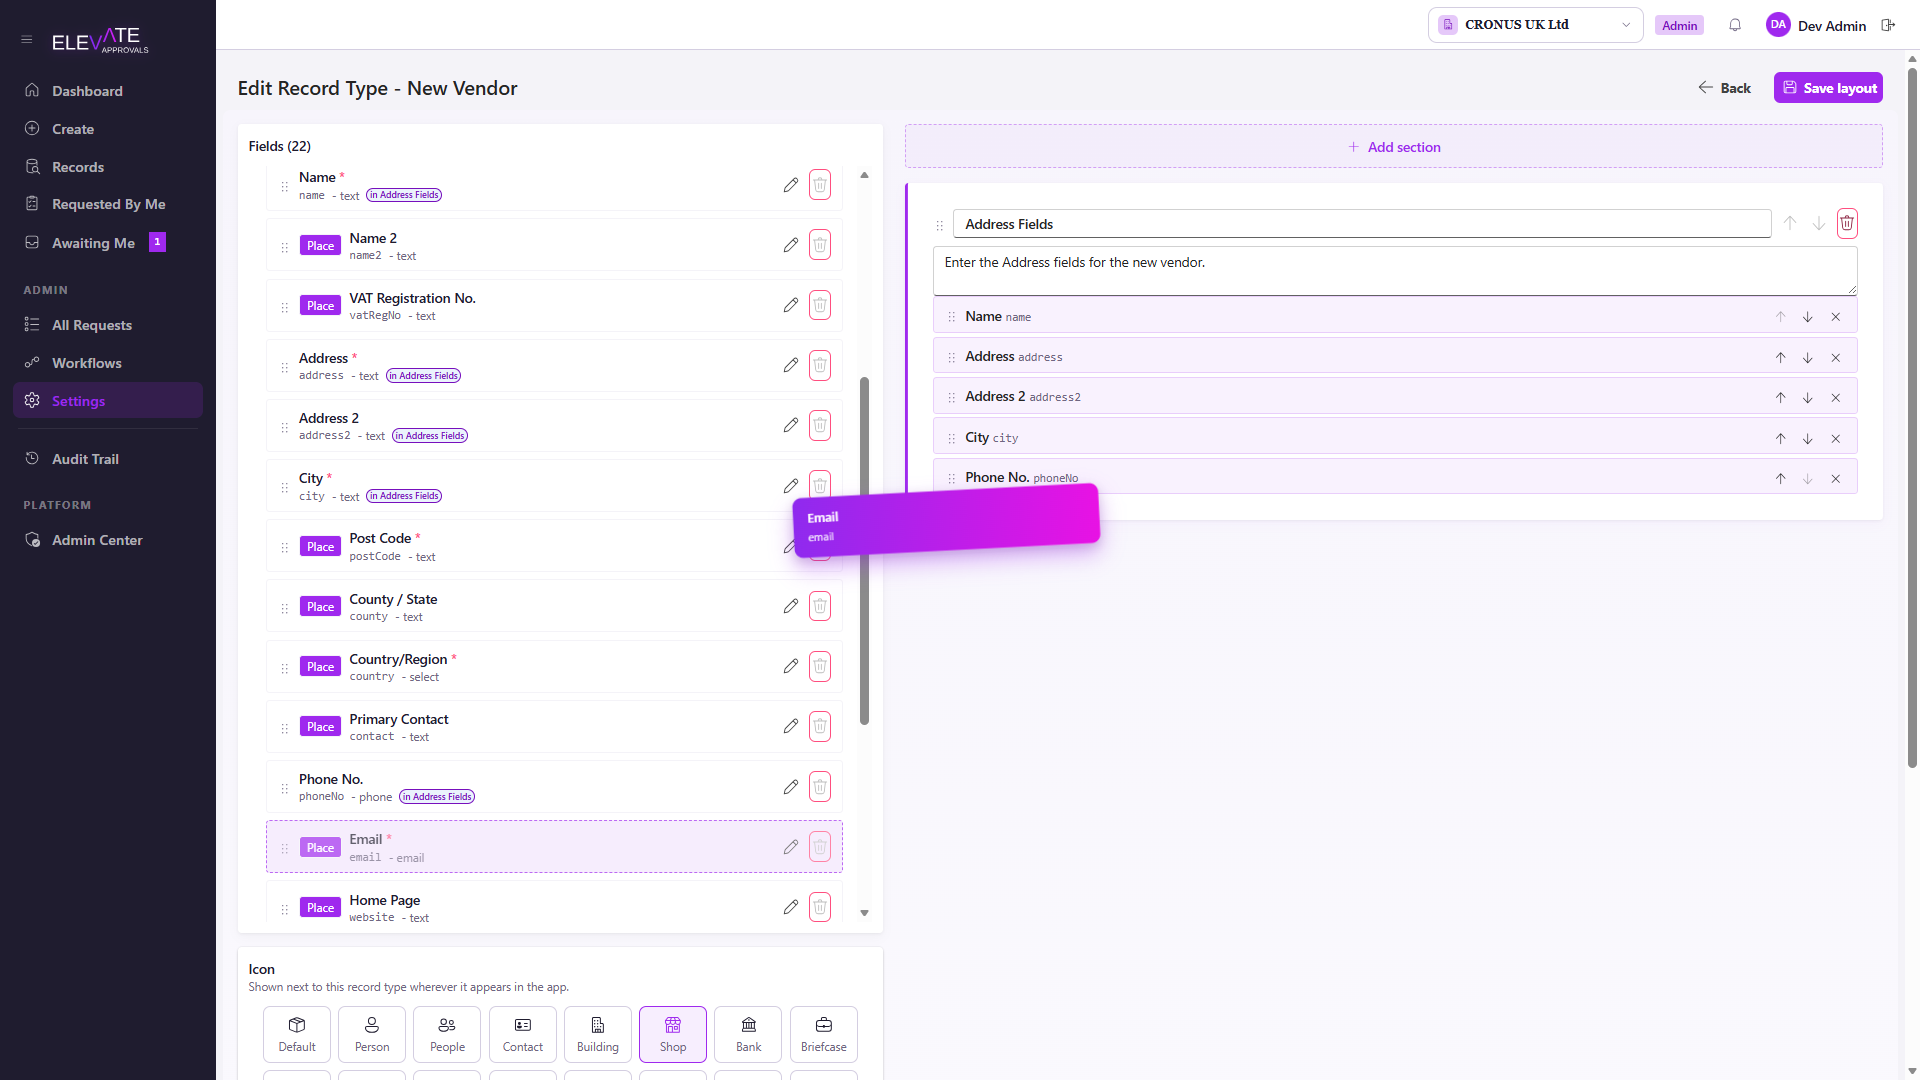
The Record Type Designer can be accessed via the Open Designer button on a record type. It replaces the default "Manage Fields" form so you can author sections and arrange fields into sections on one screen.
Open it from Settings > Record Types > pick a row > Open Designer.
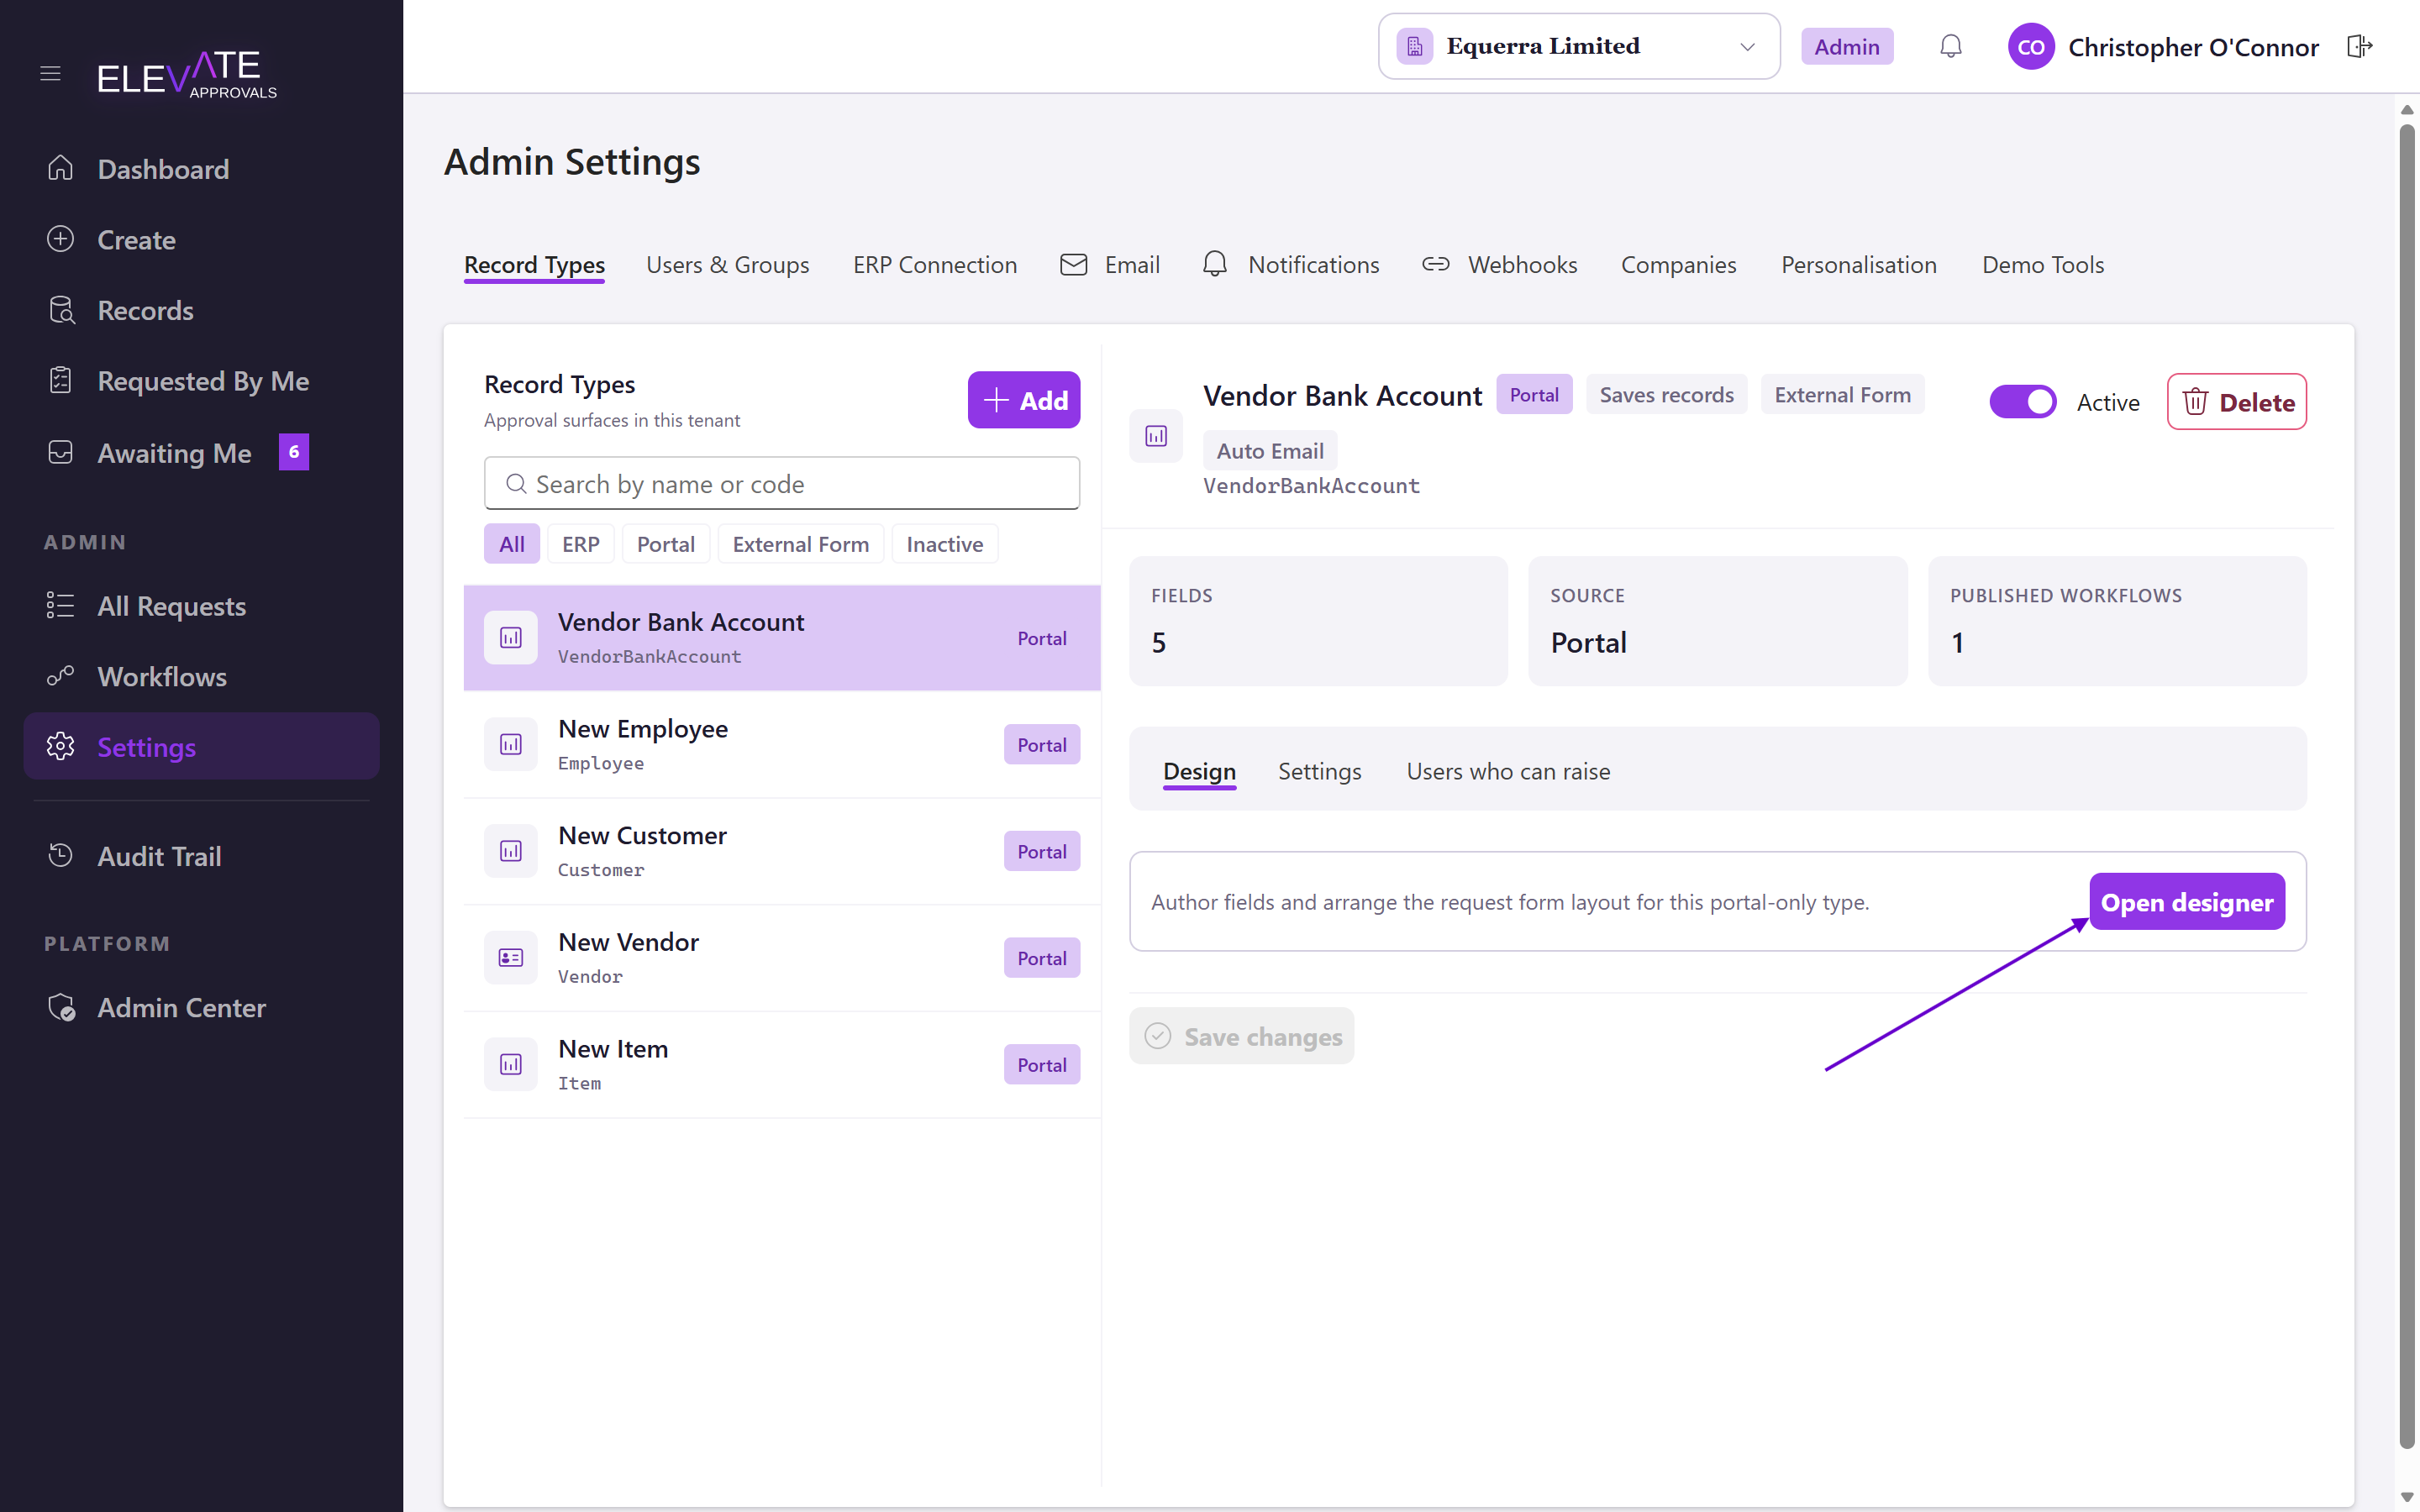
Page anatomy
The designer is a two-pane layout:
- Left pane: Fields: the list of every field that can appear on this record type's form, plus the icon picker for the record type itself.
- Right pane: Layout: the sections users actually see at Create time, with fields dropped into them.
The header carries a Back button, the record type's name and a Save layout button. Layout changes are local until you click Save; field changes save immediately.
Fields card
Fields split into two groups:
- Imported: fields synced from your ERP. The connector owns their key, type and existence. You can drag them into sections and reorder them; what you save here wins over whatever the ERP sends on subsequent syncs.
- Custom: fields authored entirely in the portal. Available on portal-only record types and, in a limited way, as extra fields on ERP-backed types.
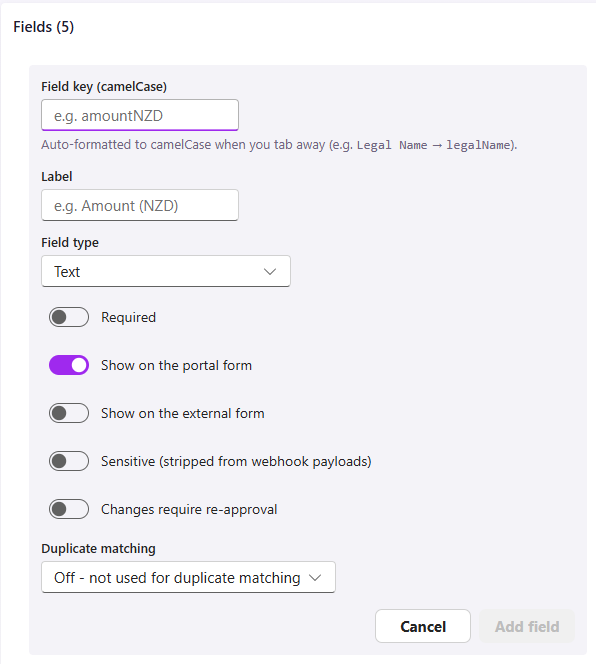
Click + Add field at the top of the Fields card to author a new field inline. The field editor expands in place; press Save to commit. For each field you can set:
- Field key: the camelCase identifier the API stores, for example
vendorName. Imported fields inherit this from the ERP. - Label: the user-facing label shown on the Create form.
- Field type: Text, Number, Select, Date, File, Email, Phone, Textarea or Boolean.
- Required: whether the field must be filled in before submit.
- Validation: minimum and maximum length, regex pattern, allowed file types, max file size.
- Visibility: hide from some roles, or hide from external (vendor) submitters who land on the form via a magic link.
- Sensitive: masks the value in audit trails and the request detail view; useful for IBAN, tax IDs, and so on.
- Duplicate match strategy: how strictly this field is checked when looking for an existing record in BC. Options: None, Exact Definitive, Exact High, Normalized Name, Contains. Select fields skip duplicate matching because their values are not unique enough.
Editing an imported field opens the same inline editor but most controls are read-only: the ERP owns those values. You can still override the presentation flags (Label, Show in Portal, Is Sensitive, Approval on Change) per tenant; a small "override" badge on the row tells you when an imported field has been customised.
To delete a custom field, open it and choose Delete. Imported fields cannot be deleted from the portal; remove them from the ERP-side configuration and resync.
Layout pane
Every record type has a layout, ERP-backed or custom. Layouts are sections of fields, rendered top to bottom on the Create form. Without an authored layout the form falls back to a flat list.
- Add a section: click the dashed "+ Add section" placeholder at the top of the right pane. Sections start blank with a "New section" placeholder label.
- Rename a section: click the section label and type. Empty labels are allowed; they collapse to a thin spacer at Create time.
- Drop a field into a section: drag from the Fields card on the left.
- Reorder fields inside a section: drag the handle on the left of a field row. The order you see in the designer is exactly the order users see at Create.
- Move a field between sections: drag the row out of one section and into another.
- Remove a field from layout: drag it back to the Fields card, or click the inline remove handle on the row. The field stays in the Fields card; it just stops appearing on the form.
- Reorder sections: drag the section handle on the section's left edge.
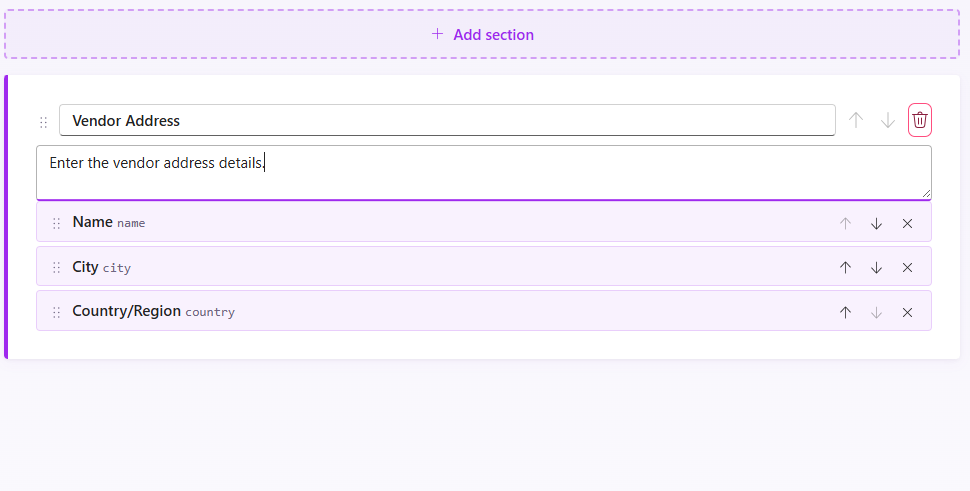
Remember to click Save Layout before leaving the page.
Icon picker
Under the Fields card sits the Icon picker. Pick any icon from the curated grid and it shows next to this record type throughout the portal. Click Default to clear the choice and fall back to the generic box icon.
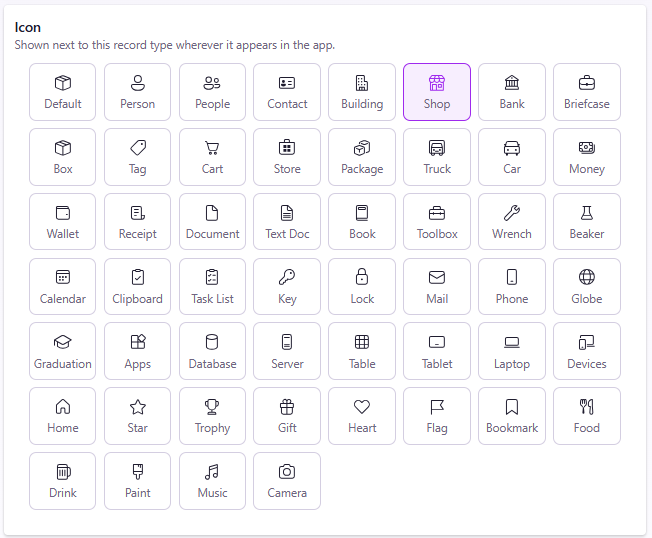
The picker auto-saves on click; there is no separate Save button.
ERP-backed vs portal-only
The two origin modes affect the designer in small but important ways:
| ERP-backed | Portal-only | |
|---|---|---|
| Field source | ERP connector syncs the field list | You author every field in the designer |
| Approved request writes | To the ERP via the connector's pull job | Fires a webhook event; subscribers do the downstream work |
| Records page | Backed by records synced from the ERP | Backed by records created from approved requests, only when Save approved records is enabled on the type |
| Delete a record | Disabled; manage in the ERP and resync | Available when the record has no in-flight requests |
Origin is set at Add Record Type time and cannot be changed: a custom record cannot morph into ERP-backed or vice versa.
Save behaviour
- Field edits save the moment you press the Save button inside the field editor; the row updates in place.
- Icon picks save the moment you click a tile.
- Layout edits are local until you press Save layout in the page header. Empty-section pruning runs at save time, so you can scaffold sections without leaving stubs behind.
If you leave the page with an unsaved layout, the browser prompts you before the navigation. Closing the tab or hitting Back without saving discards the layout edits; field and icon edits persist because they save inline.
Troubleshooting
- My imported fields disappeared after a resync: the layout pruning logic only removes sections, never fields. If a field is missing from the Fields card after a sync, the ERP connector dropped it. Check the connector logs.
- Save layout is greyed out: the layout is unchanged, or a request is in flight. Wait for the in-flight save to finish.
- A field shows up on the Create form even though I dropped it on the section: clear your browser cache and reload the page.
- The icon I picked is not showing: it shows on every consumer surface, not on the Designer page itself, where the picker grid is the source of truth. Open Records or New Request to verify.